Pages

Friday, June 29, 2012

Warm Quinoa, Spinach, and Shiitake Salad

This recipe comes from Martha Stewart.  My sister and I made this when she was in town, and it was for us the perfect summer dinner.  It's a good, hearty, and very flavorful salad.
Source

Warm Quinoa, Spinach, and Shiitake Salad

Ingredients

  • 1/2 cup red-wine vinegar
  • 1/3 cup olive oil
  • Coarse salt and ground pepper
  • 2 pounds fresh shiitake mushrooms, stems removed, caps halved
  • 1 1/2 cups quinoa
  • 1 pound baby spinach
  • 8 ounces feta cheese, crumbled

Directions

  1. Heat broiler; set rack 4 inches from heat. In a small bowl, whisk together vinegar, oil, 1 teaspoon salt, and 1/4 teaspoon pepper.
  2. On a large rimmed broiler-proof baking sheet, toss mushrooms with half the dressing (reserve the rest); broil, tossing occasionally, until most of the liquid has evaporated and mushrooms are tender, 20 to 25 minutes.
  3. Meanwhile, in a small saucepan, combine quinoa, 3 cups water, and 1 1/2 teaspoons salt. Bring to a boil; reduce heat to medium. Cover, and simmer until liquid has been absorbed, 15 to 20 minutes.
  4. Place spinach in a large bowl; add hot mushrooms, quinoa, and reserved dressing. Toss to combine (spinach will wilt slightly). Top with crumbled feta, and serve immediately.

My Minor Changes

We ended up using extra spinach, and we used half shiitake mushrooms, and half bella or something.  We also did two cups of quinoa, and I think we didn't reserve any of the dressing; it all ends up together in the salad anyway!

Monday, June 25, 2012

Classical Education: Birth to Three

Last week, I posted a brief intro on classical education according to The Well-Trained Mind: A Guide to Classical Education at Home by Susan Wise Bauer and Jessie Wise. Since we (the blog authors) all have very young kids, I'd like to summarize their recommendations for the first three years (pp. 27-30). Perhaps I'll do another follow-up with their advice for 4-5-year-old preschoolers.

"When you educate your child at home, you don't have to draw a line between parenting and teaching" (p. 26). The bottom line is to immerse your child in language from birth, though the authors share specific ideas for preparing children to learn reading, writing, and math.

Reading Preparation: "Prereading preparation works. Susan [the coauthor daughter] was reading on a fifth-grade level in kindergarten... If you create a language-rich home, limit TV and videos, and then teach systematic phonics, you will produce readers."
  • TALK: Talk constantly. Explain what you're doing and why. "This sort of constant chatter lays a verbal foundation in your child's mind. She's learning that words are used to plan, to think, to explain; she's figuring out how the English language organizes words into phrases, clauses, and complete sentences."
  • READ: Read all the time. Start with sturdy books ("a torn book or two is a small price to pay for literacy"). Read picture books, pointing to the words with your finger, then read them again and again. "Repetition builds literacy." Read longer books out loud with baby playing nearby. 
    • After reading together, ask your child questions about the story. "What did the gingerbread boy do when the old woman tried to eat him? When the dog got to the top of the tree at the end of Go, Dog, Go, what did they find? What happened after Bananas Gorilla stole all the bananas?"
    • Record yourself reading, singing, reciting, and telling stories for the child to listen over and over.
      • To this day, I remember the bedtime tape that my parents made for us to listen to as we fell asleep. I can quote those stories and poems with the same inflections that my parents told them (Mom's Puffin, Put a Poem in Your Pocket, Frog and Toad stories, Dad doing all sorts of A.A. Milne poems...).
  • ALPHABET: Teach your child the alphabet as soon as she starts speaking. Sing the alphabet song, read alphabet books, put the letters up on the wall. Teach her the sounds of the letters just as you teach the sounds of the animals. "Pigs say oink; dogs say woof; B says b, b, b.
    • Start with the sounds of the consonants. "Tell her that b is the sound at the beginning of bat, ball, and Ben; say, 'T, t, tickle' and 'M, m, mommy' and 'C, c, cat.'"
    • "Then tell her that the vowels are named A, E, I, O, and U. Sing, 'Old McDonald had a farm, A, E, I, O, U.'" Emphasize that each vowel has a sound just as each animal makes a sound, and teach only the short sounds of the vowels at first: "A as in at," "E as in egg," etc.

Writing Preparation: "Continual drawing and making counterclockwise circles will prepare the preschooler for kindergarten writing."
  • Teach your child to hold the pencil correctly from the beginning. Draw lots of circles and loops in a counterclockwise direction, as most printed letters use counterclockwise circles. "Make snowmen, Slinkies, smoke from a train, car wheels, and so forth counterclockwise."
  • Before a young child can hold a pencil, let her form numbers, letters, and circles without one. If she wants to use one, "she can use chalk on a big chalkboard or a crayon or pencil on large sheets of paper. Regular-diameter short pencils are often easier for small fingers than fat 'preschool' pencils."
  • Create basic dot-to-dots for your three-year-old (a house, a smiley face) using several big dots. Then guide the child's crayon from one dot to another to see the picture emerge.

Math Preparation: "Start to make your child 'mathematically literate' in the toddler years. Just as you read to the toddler, surrounding her with language until she understood that printed words on a page carried meaning, you need to expose her to mathematical processes and language continually. Only then will she understand that mathematical symbols carry meaning."
  • Make numbers a part of everyday life. "Start with counting: fingers, toes, eyes, and ears; toys and treasures; rocks and sticks. Play hide-and-seek, counting to five and then to ten, fifteen, or twenty together. Count by twos, fives, and tens before shouting, 'Coming, ready or not!' Play spaceship in cardboard boxes, and count backward to takeoff."
    • Each night, we count with Daniel before turning off the lamp. We started by counting to three, and eventually he started saying it himself. So we gradually added numbers, and now at 21 months, he can count to ten by himself! Maybe that's not unusual, I'm just constantly impressed by how these little guys can learn.
  • Read number books together.
  • Once the child is comfortable counting, start working on simple math sums (usually during the K-4 and K-5 years).

As a general preschool learning resource, the authors recommend June R. Oberlander's Slow and Steady, Get Me Ready, "a birth-to-age-5 activity book that provides a new, developmentally appropriate activity for each week of life. Week 1 begins with exercising the newborn's arms and legs; age 5, week 52, ends with learning to pack an overnight bag. In between, Oberlander (a kindergarten teacher) covers everything from playing peekaboo and learning "in" and "out" through tying shoes, memorizing telephone numbers, bouncing balls, and singing the alphabet while making a different body movement for each letter. It's a complete preschool in one volume. You may not feel you need this resource, but by combining the prereading instruction of the Oberlander book with lots of active play, you'll have the at-home equivalent of an excellent preschool program."
  • I found an online pdf of this book here if you'd like to peruse.

You'll probably be pleased to see that you do some of this preschooling naturally at your house, but if you're an idea-stealer like me, you're always happy for some good ones!

Got more to share?

Friday, June 22, 2012

Life Lessons Learned from Vines

First of all, on a personal note, today seven years ago I met my husband!  I'm so glad I did, I love you, Andrew!

Now onto the post.  When we moved into our home, it had had no one living in it for two years.  Here in Maryland, two years is just enough time for vines and over growth to completely take over bushes and trees.  Unfortunately, we have not had much time to devote to landscaping in our back yard, where most of the problem is.  As I have slowly used my two hands for this vine attacking job that really requires heavy artillery, I have had ample time to consider the lessons I can learn from observing these persistent plant pests.  Writing them down has been a fun exercise for me.  I have been able to see how in some ways I am a "vine," or things in my life are "vines."
  • Vines can't get up on their own strength--they have to use other plants' to pull themselves up.
  • Vines can't grow straight and tall.
  • There are many kinds of vines with many different characteristics.
  • Some have very beautiful flowers, but they're still vines!
  • When you're a new gardener, it can be very hard to tell the difference between a vine and a tree--something involuntary and something the gardener planted on purpose because it had a beautiful or functional use.
  • What starts with a single small coil can eventually take over a whole tree.
  • Most vines aren't very strong, but they grow very fast.
  • Just because you have identified and cleared out the vines once, doesn't mean you're finished; you need to be constantly watching for their skinny fingers.
  • The sooner you identify the vines and take care of them, the easier it will be to stay vine free.  Don't wait untill it's too late!
  • Vines and overgrowth lead to seemingly unrelated problems (like ticks).
  • To really take care of the vine, you need to get all the way to the roots--which is considerably harder than constantly cutting it back.
  • If the vines are too advanced, you might need outside help.
  •  Ignoring vines doesn't do anything to make them go away--it takes consistent effort and focus.
  • Only after you've cleared away the vines can you see the tree for what it is, and reveal the true potential of a garden.
  • After much sweat and hard work, it is very rewarding to find that all your vine-clearing effort had saved a beautiful flowering cherry tree!
Any lessons I missed?

Thursday, June 21, 2012

A Classical Education at Home

We are leaning toward homeschooling our kids, though it's daunting to consider. What do I do? What do I teach? How do I learn it all? What's the best way? There are countless philosophies, ranging from one extreme to the other with everything in between. I've barely scratched the surface in discovering my options, let alone exploring them. Fortunately, the whole idea of homeschooling allows for endless flexibility.

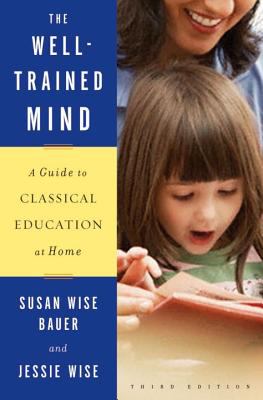
For my birthday last month, Keenan gave me a resource I've been curious about: The Well-Trained Mind: A Guide to Classical Education at Home by mother-daughter duo Susan Wise Bauer and Jessie Wise. I was impressed at the biographical merits of these women. Their experience and education more than qualify them as guides for parents who are eager to give their children a classical education at home.


What is Classical Education?
If you're like me, you're not sure exactly what is meant by "classical education." This post provides but a scant overview, based on what I've read so far. Here is a snippet from the Introduction (p. xxii):
What is a classical education?
It is language-intensive -- not image-focused. It demands that students use and understand words, not video images.
It is history-intensive, providing students with a comprehensive view of human endeavor from the beginning until now.
It trains the mind to analyze and draw conclusions.
It demands self-discipline.
It produces literate, curious, intelligent students who have a wide range of interests and the ability to follow up on them.
The Well-Trained Mind is a handbook on how to prepare your child to read, write, calculate, think, and understand.
How is the Curriculum Structured?
This book is a textbook in itself. It "provides information on teaching all the subjects in the classical curriculum for all twelve grades -- literature, writing, grammar, history, science, math, Latin, modern languages, art, music, debate, and more" (p. xxv).

The structure is based around a three-part process to training the mind, called the classical pattern of the trivium (from pp. 13-14, a bit reworded):
  1. The "grammar stage" (grades 1-4) prepares the mind to absorb information through memorization of facts: rules of phonics and spelling, rules of grammar, poems, the vocabulary of foreign languages, the stories of history and literature, descriptions of plants and animals and the human body, the facts of mathematics, etc.
  2. The "logic stage" (grades 5-8) builds on the facts absorbed in the first phase. It is a time when the child begins to pay attention to cause and effect, to the relationships among different fields of knowledge, to the way facts fit together into a logical framework. At this age, the mind naturally begins to think more analytically. A student is ready for the logic stage when the capacity for abstract thought begins to mature. During this time, the student learns algebra and logic, and begins to apply logic to all academic subjects.
  3. The "rhetoric stage" (grades 9-12) is the final phase of a classical education, and builds on the first two. At this point, the high-school student learns to write and speak with force and originality. The student of rhetoric applies the rules of logic learned in middle school to the foundational information learned in the early grades and expresses conclusions in clear, forceful, elegant language. The student also begins to specialize in whatever branch of knowledge attracts her; these are the years for art camps, college courses, foreign travel, apprenticeships, and other forms of specialized training.
I find it interesting how the system is centered around history: "To the classical mind, all knowledge is interrelated... A classical education [takes] history as its organizing outline, beginning with the ancients and progressing forward to the moderns in history, science, literature, art, and music" (pp. 14-15). The authors recommend that the twelve years of education consist of three repetitions of the same four-year pattern: the ancients (5000 B.C. - A.D. 400), the medieval period through the early Renaissance (400-1600), the late Renaissance through early modern times (1600-1850), and modern times (1850-present). "The child studies these four time periods at varying levels -- simple for grades 1 through 4, more difficult in grades 5 through 8... and taking an even more complex approach in grades 9-12." I was fascinated by the descriptions and examples of how the other areas of the curriculum are linked to history studies, but this post is already too long to share!

Children Can Do Hard Things
The authors emphasize that the benefits of this education are not exclusively academic:
Rigorous study develops virtue in the student: the ability to act in accordance to what one knows to be right. Virtuous men (or women) can force themselves to do what they know is right, even when it runs against their inclinations. Classical education continually asks a student to work against her baser tendencies... in order to reach a goal -- mastery of a subject (p. 17). 
As a Suzuki violin teacher who requires daily practice from my students, these words couldn't ring truer. Yes, working daily at something difficult but worthwhile gives a student proficiency, but even more valuable are the dozens of life skills absorbed throughout the process.

Still Daunted?
I am. Truth be told, this book hasn't helped the intimidated parent factor much. But the authors insist that any parent can succeed.
All you need to teach your child at home is dedication, some basic knowledge about how children learn, guidance in teaching the particular skills of each academic subject, and lots of books, tapes, posters, kits, and other resources. This book will provide you with everything except the dedication (p. xxii). 
Maybe I can muster that. ;) I don't know yet if classical education is a match for my family, but it's been interesting to study. In fact...

STAY TUNED!
The first item that popped out at me from the Table of Contents was the little section called Preschool: Birth to Three. This is what I originally intended to blog about today, but as I got going, it seemed a basic introduction was necessary. You can watch for that post next week.

Do you know any homeschoolers who follow a classical education? Please share your thoughts!

Tuesday, June 19, 2012

Chromium and Insulin

I was recently looking through a favorite nutrition book of mine when I came across some information I'd forgotten: chromium deficiencies = insulin resistance, and ultimately diabetes. Consequently, signs of a chromium deficiency follow the same vein that signs for insulin resistance and diabetes do, namely: fatigue, frequent urination, irritability when one has gone without food for prolonged periods of time, and cravings for sweet foods (which will make sense to you when read the last bullet bellow. Our bodies just know what we need).

Chromium is among those lovely little minerals that are susceptible to modern food processing techniques. Moreover, high sugar diets actually deplete the body of this cherished substance. Most foods that would normally be good sources for this mineral are no longer that, in our day. Thank heavens for traditional food preparation methods!


Good sources of this mineral follow.
  • Butter from cows who are allowed their natural diet
  • Meat from animals allowed their natural diets (Did you know that many vitamins and minerals are dependent on good fat for proper absorption in the body? Fascinating.)
  • Organ meats
  • Properly prepared whole wheat, and nuts
  • Molasses
  • Eggs from hens consuming the proper diet (Which eggs are the right eggs to buy? Stay tuned...)
  • Interestingly, chromium is found in abundance in foods that are used to make sugar products, corn, sugar beet, and sugar cane. Sadly this, and many other beneficial components of these plants, are stripped and discarded in the refining processes used to make sugar. I find it fascinating and beautiful that the whole plant as God made it, has what our bodies need to help regulate the absorption of all it's components.
For more information see Nourishing Traditions pp. 13, 24, and 43. There are also countless other fantastic sources for information on this out there. Please feel free to look them up, just be weary of sources that tell you to consume processed meat products. I've read it in many places, and I just can't agree. If you're interested in knowing why, please feel free to ask.

Sunday, June 17, 2012

Cafe Rio style

No time for a real post today, so I'll just share a recent meal.  I thought after work on Thursday, "You know, Cafe Rio sounds pretty good tonight.  Maybe I should just have Cam pick some up..." But I felt a little guilt, considering that it's not a perfectly healthy choice and certainly not the cheapest.  Then it occurred to me that I could make a good Cafe Rio-style meal all myself!

I ground some flour from spelt, kamut, quinoa, & wheat and set it to soak, figuring 6 hours of soaking was better than nothing.  (Read here to find out why I soak.)  Just as Cam was getting home I used the dough for homemade tortillas.  My first attempt at these, and they turned out great!  I felt so proud.

I put some black beans on the stove, hoping they would be soft in time for dinner (they almost made it).  I threw in some garlic with them.

I threw a whole organic chicken in the oven, seasoned just with lemon juice, pepper, salt and garlic --- the remains of which I used for stock later in the week.

I put some brown rice in the rice cooker.

I chopped tomatoes, lettuce, cucumbers, and of course plenty of cilantro!  I grated some raw cheese.

 The whole affair really didn't take me that long, since the only really time intensive part was the chopping (10 minutes), and rolling/frying the tortillas (15 minutes).

Luckily, I had bought some "homemade" creamy cilantro dressing earlier that week.  Not the best option, since it did have sugar, but I'm sure there is a good recipe out there for a similar dressing.  Next time!

The only thing missing was the guacamole.  But I have since made Nonie's recipe (with plenty of added tomatoes), which I love!


Friday, June 15, 2012

My Garden Experiment

One of the things I have been most excited about since buying a house in September is starting a garden.  I don't know much about gardening, never having been the queen of my own garden before, but weeding and helping in the garden was always my favorite Saturday's chore.  

When spring came around, I didn't feel like I was up to the task of doing a whole garden from nothing.  Our focus has recently been on house projects, I'm expecting a baby in September, and my yard is mostly shady and I haven't yet figured out where to put the garden.  Those are my excuses, take them or leave them.

But I couldn't let a growing season pass without trying something!  So I bought a few basic seeds, found a bunch of pots in my shed, and bought a good pot soil.  The extent of my reading on the subject, I'm embarrassed to say, is the back of the seed packet.  

About a month ago, I planted the seeds.  Because I'm an impatient gardener, I also bought some starts of the most important vegetables.
After a month or so, this is what my garden looked like!  I was pretty surprised that with a little water and sunlight every day, plants do just grow!  (The three tallest were from starts.)
I started noticing that many of the plants were stopping to thrive in the pots.  They were growing out of their little homes, and I just didn't have enough big pots to keep repotting them.  So on a whim, I decided to move them to the ground.  Where?  Just where they had been sitting in pots, because they seemed to be doing okay there!
I removed the grass (and found tons of wasp larvae!).
I was right; some of the plants were just exploding out of their pots!
Then I plopped them in the ground, after adding a bunch more (potting) soil.  I have sweet peppers, two kinds of tomatoes, cucumbers, mint, basil, peppers and a few carrots, all planted too close together.
Things seemed to be going well, so I decided to start a few more plants. 
I did it the same way as before, because that seemed to work.  Then when the starts are big enough, I'll clear out more grass!
I planted a few seeds in each pot: beans, zucchini and pumpkin.  I put this little grate on top so the birds and squirrels (and little boys) don't get the seeds before they get a chance to sprout.
A week later, they look great!
Rather, everything but one pot of beans looks great.  The beans in the small pot are doing well, though.
So far, it has been very rewarding.  I have been surprised and impressed at the daily growth I can see in my tiny garden.  It has definitely given me the bug to keep going!  I anticipate during all the cuddling with my newborn this winter I'll have time to read up on just how to do it right, what really should go into the soil, where (besides Home Depot) to get the seeds, and why one of my tomato plants just has one big beautiful tomato and why my my cucumber plant just has one big beautiful cucumber.
For now, I couldn't be more proud of my cucumber and my tomato!
These little yellow pear tomatoes are popping up all over the place, so at least I'll have lots of those!


As a bonus, here's a butterfly (right) on another surprise flower!
What suggestions do you have for a first-time gardener? What books should I read or websites should I look at?

Happy summer, and I hope you're all getting lots of outside time, in whatever form you can get it!

Wednesday, June 13, 2012

The VOC Question

My husband and I are purchasing our very first house. I wish I could include a triumphant trumpet sound to that sentence. Go back and reread that with the trumpet in your mind. We are SO excited!

We are lucky, the house we are purchasing is in excellent condition, and so we'll be making it our own with little changes, like repainting rooms here and there. No large renovations needed.


Our first order of business has been to repaint the front room where Joe's piano will reside. I had never thought of this as a potentially harmful venture in our day since lead paint was outlawed in the 70's. But did you know that most paints still contain potentially harmful ingredients known as VOC's (volitile organic compounds)?


I had never heard of VOC until my good friend, Mia, told me about them when she repainted her house. VOC's are solvents that are in many many household items you and I use on a daily basis. Anything that gives off a strong odor is a likely culprit, such as strong cleansers, plastics, vinyls, even furnishings in your home such as certain types of carpet. VOC's are both found in nature, and are man made, and are linked to a host of health issues ranging from minor to severe headaches, eye, nose and respiratory problems, even liver issues, and cancer, (the man made VOC being the more toxic of the two).

Those are the health issues. There is also the issue of what chemicals we are releasing into the world around us. Even if these didn't cause my family health issues, what are my projects doing to our environment? Just a thought.

My specific point today is to let you know there are low-VOC and non-VOC paints being manufactured now!! In Utah the only brands I have been able to find are Olympic and Behr -- with these brands, as with a few, you will find the base white paint is VOC free, but adding tint will ad unspecified amounts of the compounds into the paint. Also, according to this consumer report, some low-VOC paints leach less of the compounds into the air than the tinted non-VOC brands. Having used the Olympic brand, I will tell you I was impressed with how little odor there was when we painted. Also that brand seems to have excellent durability. Again, because we used tinted paint, I have no idea how much VOC my paint ended up containing.


In the past VOC-free paints were considered poor quality, but most brands are receiving rave reviews today. And they come in a great variety of colors! True non-VOC paints, all tints included, included such brands as Freshaire Choice, and Mythic. Low-VOC brands include Benjamin Moore Aura, Behr, Olympic, and Glidden. Sherwin-Williams also advertises to sell other brands but I'm out of studying time at present. :)

Hope this information was helpful! And thanks to Mia for letting me know about it.

Monday, June 11, 2012

Meal Planning Miracle

So, I'm not going to share the numbers here, but last month I spent way more on food for our family than I intended.  We do buy all organic food, but we compensate by not buying much packaged stuff, making things like bread or dressing from scratch, and buying in bulk as often as we can.  I still came in way over my goal food budget.  I emailed my co-authors here and asked for posts on their real food budgets and so hopefully we'll see them soon!  In the meantime I created a very simple chart for myself that has already saved me time, mealtime dilemmas, and definitely money.

My chart looks like this.  I actually just print the blank chart and fill it in, but I typed this week's notes up so you could see how I do it.  This is word for word what I have down this week:


Sunday
Monday
Tuesday
Wednesday
Prep for Today:


Prep for Tomorrow:
- make chicken stock
- thaw beef
Prep for Today:


Prep for Tomorrow:
- soak cracker wheat
- skim stock
- soak beans
Prep for Today:
 - make crackers


Prep for Tomorrow:
 - thaw lasagna
Prep for Today:
- make Nonie's applesauce

Prep for Tomorrow:

Dinner Plan:
- whole chicken
      garlic
      lemon
- sweet potatoes
      honey
      ginger
- green salad
      lettuce/kale/chard
      tomatoes, cuc.
      dressing
- stuffed artichokes
      bread crumbs
- leftover homemade ice cream
Dinner Plan:
- hamburgers
      pickles, tomatoes
      lettuce
      raw cheese
      mustard, ketchup
      mushrooms
- corn on the cob
- leftover sweet potatoes
- green salad
      lettuce/kale/chard
      tomatoes, cuc.
      dressing
    
Dinner Plan:
- stew
      leftover chicken
      chicken stock
      carrots, celery
      kale/chard/spinach
      zucchini, onion
      broccoli, garlic
      mushrooms
       red potatoes
- homemade crackers
- raw cheese
- Melissa's homemade brownies
Dinner Plan:
- leftover lasagna
- peaches, pears
- asparagus

Thursday
Friday
Saturday
Prep for Today:


Prep for Tomorrow:
- grind and soak tortilla flour
- soak beans
Prep for Today:
 - make guacamole
- make tortillas
- start beans 6-8 hrs EARLY
Prep for Tomorrow:
Prep for Today:


Prep for Tomorrow:
Dinner Plan:

CAMERON
- pasta
       artichoke hearts
       peppers
        mushrooms
       spinach
        cream

Dinner Plan:
- stuffed tortillas
        rice, beans
       veggies
               zucchini
               peppers
               onion
               tomatoes
        guacamole
       sour cream or cheese
- fruit
-  homemade ice cream
Dinner Plan:
- out to eat with Cinde and Anai

Ideas for next week:  stuffed peppers, veggie lasagna, stir-fry with rice, homemade pizza, Ariel's avocado pasta
_________________________________________________________________

I know there are fancy websites out there like Plantoeat, which I think is a fantastic idea.  You input your recipes to your calendar and it exports the ingredients to a shopping list for you.  But it poses two problems for me --- one, the recipe importing takes too much time (though once you have a bunch stocked up I'm sure it's an overall time saver), and two, if I get on the computer to do meal planning I will get sucked into other online distractions like email, news, or blog-reading.  That's why I print my own chart off and do everything by hand.

This is a system I know I"ll stick to!  It took me less than a half hour to plan my whole week last night, and to make my shopping list.  Here is what I do:
  1. I pick up my organic produce basket from Bountiful Baskets Saturday morning.
  2. I note what is in the basket, and what is already in my fridge, and plan the next week's meals Saturday afternoon or evening (or Sunday morning).
  3. I fill in the above chart, and as I fill it in I make a shopping list for any remaining necessary ingredients.
  4. I go shopping Saturday afternoon or Monday after work.
  5. At the store, I don't let myself buy anything that's not on my list (today I passed up 4-5 things I would normally just have thrown into my basket, like...mmm...those strawberries :(  or cottage cheese)  I make an exception if I know it's something we need that I simply forgot to write down, like dishwashing soap.
  6. I proceed with my week, carefree and organized.  No hastily concocted meals, no missing ingredients, etc.  And definitely saving money.
  7. As the week goes on I remain flexible if necessary, and of course jot down ideas for next week as they come to mind.  
Cameron is a great help with clean-up, and with preparation when he is home on time.  I leave at least one day a week for him to plan, and I pick up the ingredients since he works longer days than I do.

I'm also holding on to all receipts for later accounting.  This month, I want to write up how much I spent on each individual food item and analyze where I can save next month.  Since that will be kind of time-consuming I only intend to do it until I get a good handle on things.

It's been two weeks now, and I'm loving the change!


Friday, June 8, 2012

Grandpa's Rhubarb Pie

This, obviously, isn't really Grandpa's pie.  I made this one.  His would look much more professional.
This isn't a healthy recipe, but it is delicious.  Feel free to make a healthy pie crust, and substitute your favorite sweetener for the sugar!  I didn't have quite enough rhubarb (I was making two pies), so I substituted with some strawberries.  Real Evanses like our rhubarb undiluted the way Grandpa makes it, but it's probably more broadly appreciated with (fresh picked) strawberries.  Serve hot with cold ice cream!

Rhubarb Pie

Ingredients:
3 cups rhubarb
1-1/2 cup sugar
3 tablespoons flour
Dash sal1/2 teaspoon 

Grated orange rind from one orange
2 tablespoons butter
1 well-beaten egg


Directions:
Combine rhubarb, sugar, flour, sale and orange rind.   Fill unbaked pastry-lined pan, dot with butter and pour egg over top.   Leave uncovered, strip or cover with top crust.   Bake in hot oven, 450 degrees F, for 15 minutes.   Reduce heat to moderate, 350 degrees F, about 30 minutes.

Wednesday, June 6, 2012

Yummy Good Brownies

 Source


Note: The above picture is not my own, though, mine do look basically the same. I just don't have a camera.

I haven't been able to peal myself away from chocolate... I'm working on it, though. In the meantime I love these chocolate peanut butter brownies. I assume you will use good quality organic ingredients, so I don't specify in the ingredients list. Enjoy! (This recipe could easily be made with carob. Is there any special conversion you use carob for chocolate, Nonie?)

Ingredients:
4-5 ounces baking chocolate, (the kind you melt)
1 cup butter softened, or half cup softened butter/half cup coconut oil
1 1/2 cups rapadura 

3 eggs
1 cup ground almonds, (If you buy these raw, soak them over night in salt water, and then dry them in your oven at 150 degrees, it releases nutrients and neutralizes antinutrients found in the skins of the almonds. You can just grind these to a course meal in any food processor.)
3/4 cup sprouted grain flour

2 Tbl. Sp. Arrow root starch (Some grocery stores carry this now, if not try the health food store, or online.)
1-2 tsp. vanilla
Peanut butter, you choose the amount, I never measure :)


Directions:
Melt the chocolate using a double boiler method, (I don't have a double boiler, so I just use a sauce pan and a glass bowl. You boil some water, and while it is simmering put a glass bowl with your chocolate in it in the water... pretty soon the chocolate is melted). Let the chocolate cool slightly, then add butter and Rapadura. Add eggs one by one, mixing thoroughly between each addition. Slowly mix arrow root with almonds, (arrow root tends to fluff into the air when mixed into batters by itself), and then add that mixture and the flour into the batter. Pour batter into pan size of your choosing, depending on how thick you like them. I don't grease my glass pan, and haven't had a problem. Put spoonfuls of peanut butter all over the top of the brownie batter, and then swirl it into the batter using a butter knife. Cook at 350, for approximately 20 minutes, depending on you oven. Brownies are done when the sides slightly pull away from the edges of the pan, but the center is still a little jiggly. Stores best refrigerated.

Note: You can make this recipe gluten free by omitting flour, and simply using a full cup of arrow root starch. Arrow root has a natural vanilla taste to it, so I might recommend reducing the sweetener a little if you choose to go this route.

Sunday, June 3, 2012

Fertility Awareness

I’m going to get a little more personal in my post today, with the upfront disclaimer that I am not making recommendations for anyone --- just sharing my own experiences. 

Before we were even engaged, Cam and I decided together that when we got married we would not use traditional hormonal birth control.  (Er, traditional for the last few generations).  There is a lot of hype in the political news recently about birth control, and there has been on and off since the women’s movement.  Although Cam and I are religious people, our decision was not based primarily in anything religious, which is why it is a shame to me that a decision not to use the pill is often automatically associated in the public mind with some sectarian injunction.  There is nothing wrong with a couple making such a decision based upon their religious or moral values, but there is a broad set of reasons outside of any religious realm that they might consider doing so.  Understanding those reasons might open up a new door for couples who don’t feel that hormonal birth control is for them.

These are the reasons we did not want to use hormonal birth control.  (I acknowledge that for many people, it works just great):
  • Most simply, I did not want to throw off my body’s hormones.  Whether or not birth control would make me moody and unpredictable, whether or not there were any visible harms, I don’t know enough about those chemicals to trust them with my body.
  • I did not want to deal with the various side effects associated with every hormonal method, however benign.
  • I have been a little concerned about potential permanent changes that hormonal birth control can cause in the body.  A couple friends have had trouble getting a regular period again once going off birth control, and have had great difficulty conceiving.  Would that be me?
  • We wanted to be able to choose, without having to undergo any procedures or wait for a regular cycle to return, when we would conceive our children.
  • Cam agreed with me that traditional birth control is not fair.  He is fertile 100% of the month, while I am only fertile 2 days of the month.  So I should be the one chemically to alter my body in order to avoid conception?  We felt it should be a joint responsibility.
But I believe in responsible parenting, and in God-given agency, which led me to feel strongly that Cam and I should choose when we conceive our children.  It is under this same philosophy that most people use birth control.  So we researched the Fertility Awareness Method (FAM) before we got married, and I learned things I always should have known about my body and the reproductive process but that I never knew because people don’t talk about them because they assume you will just use regular birth control someday.  The basic philosophy of FAM (when used as birth control) is that a couple should be aware 100% of the time if a woman is ovulating or nearing ovulation, and when she is no longer fertile each cycle.  They should base their intercourse responsibly upon their data.  Some couples choose to abstain during the fertile period, while others use a barrier method. 

Here are some important basics to know when embarking upon FAM:
  • The woman’s body is only fertile roughly 48 hours of her cycle, during ovulation.
  • Sperm live typically 3-5 days from the time of intercourse (yes, you can get pregnant while out for a jog a few days after the fact…)
  • Every woman’s body ovulates differently, though 14 days into the cycle is a rough average for most women (WARNING: FAM is not the same thing as the Rhythm Method, which is based on a set 28 day cycle that simply does not apply to all women.  Read on to find out how to use FAM for much much greater accuracy)
  • A woman’s body temperature rises about a tenth of a degree the day after she ovulates, and goes back down at the beginning of her next period.  If her temperature fails to drop again for an unusual amount of time, she is pregnant.
  • Cervical fluids increase in thickness as a woman’s cycle approaches ovulation, and the cervix begins to soften and open.
  • A woman’s cycle can see irregularities if she undergoes stress, or a big life change, etc.  Or some women are just irregular.  One cannot depend on the calendar to predict fertility.

Unprotected intercourse should cease 5 days before ovulation (we do 6-7 days before for absolute security), and should not resume again until 48 hours after ovulation. 

So how do we know when I will be fertile?  There are four ways which, when combined together, make for perfect accuracy.  I Will Not Write All The Details Here Because If You Are Interested In FAM You Need To Prepare Yourself to Practice It Responsibly By Reading Up.  I keep a detailed chart every month of all the following.  It really takes no time at all:
  • It might sound like a pain, but this is not any harder than popping a pill every day.  Every morning when I wake up, I take my temperature and write it down.  (Funny story, when I started charting a few months before marriage, I woke up in the middle of the night a few times to find myself taking my temperature.  Yes, I sleep-chart).
  • I monitor my cervical fluid throughout the month, writing “dry, slippery, stretchy, etc.” on my chart every day.
  • I monitor the position and softness of my cervix, by feeling inside.  This measure and the preceding one don't take any extra time.  I just check them when I am using the bathroom once a day when I am approaching my fertile time.
  • I keep track of previous cycle lengths to get an idea of how long the next might be.  Do not use this method alone, but it helps when combined with the other three.  If you are really expert, you can also keep track of moods and cravings.  But these are not as scientific as the first three measures.


FAM will fail you as a birth control method in the case of human error.  The pill or other birth controls can fail you too, even if you make no errors on your end.  FAM is as reliable as you are.  You are leaving nothing to chance.  That’s comforting, no?

I can think of only one time I made a miscalculation on my charting.  It was the only time that 1) I wasn’t meticulous in my estimate of when I would ovulate and 2) Cam wasn’t fully aware of where I was in my cycle.  (This really is a team effort).  That was the time I got pregnant --- a highly unlikely scenario when you know all the details.  I actually noticed my error before I knew whether I was pregnant or not, and prayed that I wasn't.  But then my temperature never dropped.  I feel God led us to this, especially now as I write about it while nursing my beautiful baby boy.  Unlike many other birth control methods, FAM if practiced properly cannot fail you.  It’s physically impossible. 

Incidentally, if you are trying to get pregnant, you can use FAM to predict ovulation to time intercourse for the optimal chances of conception.

These are the reasons we have loved FAM:
  • No crazy hormones, no undesirable side effects.  It’s natural. 
  • Cam is aware of my body and its patterns.  We are a team.
  • In the beginning, we practiced abstinence during the fertile period for greater security (although one can use a barrier method), and found that we enjoyed discovering many varied ways to show love to each other.  Cuddling on the couch, kind words and acts of service, some old-fashioned kissing, etc.  We also found that it keeps a little spark alive to have some anticipation build a bit every month.  I have heard some orthodox Jewish friends talk about this as well, since intercourse is off limits for them during menstruation and a little afterward each cycle. 
  • It keeps our thoughts and hearts focused toward God on the question, “When should we conceive a child?”  Although intimacy is important for a couple for many reasons, it is inherently connected to child-bearing.  FAM helped us maintain that connection in our hearts.
  • The best reason on my end: I learned so much about my body.  I didn’t even know what my cervical fluid was before I started studying, let alone what its purpose was, let alone that aberrations in your normal pattern can signal that something is wrong.  (Women have caught cervical cancer before because they were practicing FAM).  Even if you don’t want to use FAM as a birth control method --- and the only reason not to, in my opinion, is that it takes a bit of conscious effort --- it feels fantastic to chart your body’s patterns and be aware of its cycles.  Our wonderful bodies need our detailed attention.  If we give it to them, we learn to love them more.
Finally, a note on postpartum FAM.  I have done a lot of research on this, and although people say it is possible to practice FAM postpartum, I believe the only real security is in abstinence, a barrier method, or traditional birth controls until a regular cycle resumes.  Breastfeeding is not reliable birth control.  My recommendation, if searching for natural birth control, is to use a barrier method until your regular cycle resumes and you can begin charting again.

Thanks for bearing with an intimate post.  I share these things because they have been very important to me in my journey toward natural living, and because they have given me confidence, joy, and a sense of empowerment.  Knowledge is beautiful. 

To learn more about FAM, and to understand how to practice it correctly, read this book.  Or to understand your cycles and hormones and what's really happening to you every month.  Or read it anyway:


p.s. I had fun choosing labels for this post.